DIY a WiFi-enabled LED Bar Sign
Materials needed: ½” acrylic, ⅛” birch, Particle Photon board, WS28212 LEDs
Machines used: Laser cutter
Software used: CorelDraw
Classes necessary to replicate: Laser cutter class, Electronics, Arduino (C++)
—
If you’ve ever spent the $30 and 3 hours building a generic brand bookshelf or 300+ hours shopping and spending to furnish an entire house, you know how equally exciting and boring it is.
Sure, decorating and designing your dream home is an incredible journey, but going through the hours of sales talks from home furnishing experts and scrolling for days on Pinterest to potentially find that perfect DIY project can be overwhelming.
At the end of the day, it’s easy to know what you want. But it feels nearly impossible to find that—or settle for anything less.
Why can’t you just create the exact kind of furniture you’re seeking?
Here’s the good news: The tech is already in the works at consumer-friendly companies like IKEA and designer-friendly companies like BoConcept.
The reality is that these options simply aren’t accessible to Alaskans, nor will they be for a while.
Here’s the better news: There are options available for you to build furniture and decorations right now in Anchorage.
The answer is using a little bit of that time and a membership that gives you 24-hour unlimited access to a space for makers, shakers, and creators.
This is the first part of Anchorage MakerSpace’s Furniture MicroSeries, highlighting a variety of projects made to live in homes.
—
The first project up is certainly a highly lit one: a basement bar’s bar sign.
Like any good home bar, the origin story, told by one of our Makers Steven, is a classic:
My buddy Brett had just bought his house and it has a sweet basement. We’d play foosball in it and he had a half set-up bar, but no bar sign! So I decided to make it for him.
Steven started by designing the logo in CorelDraw—a vector graphics editor best used for 2D designs.
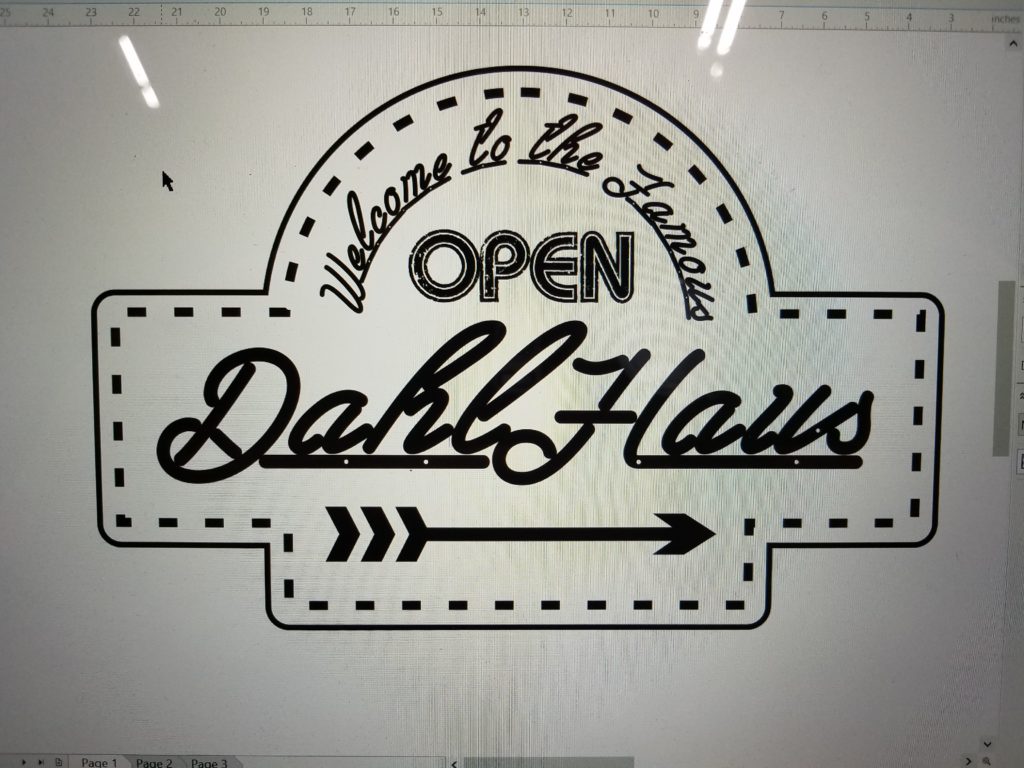
Using the design as a framework for the project, Steven had to make a couple of decisions for the design, including what material would be best for coupling with the LEDs of the sign.
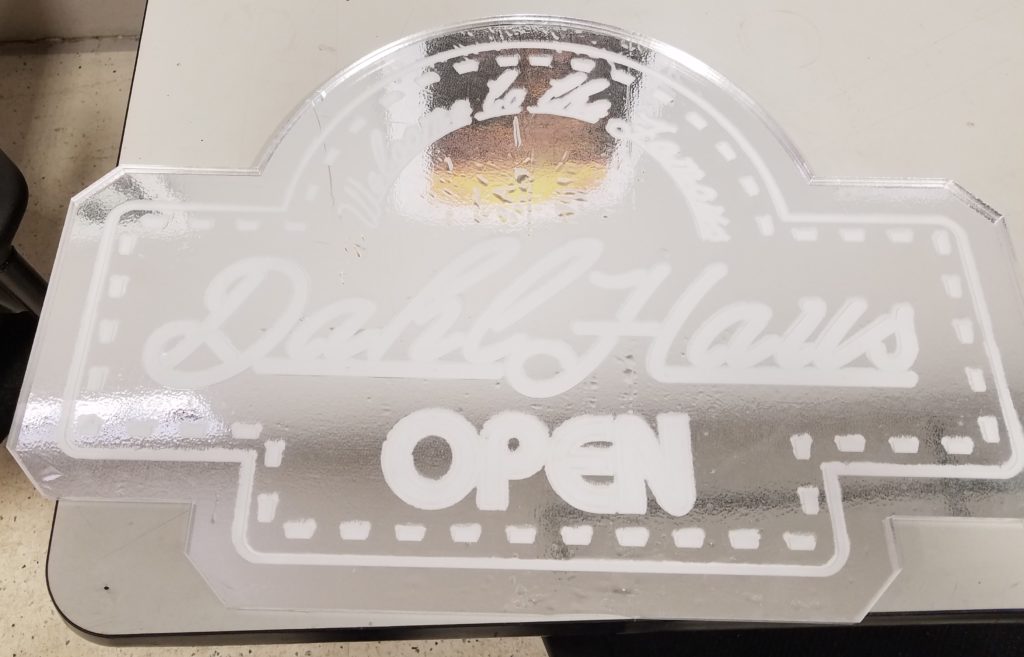
After some careful deliberation, he decided to go with ½” acrylic.
Acrylic provides a variety of benefits for sign-making; not only does it look good and provide good refraction—the reflective properties—but acrylic is also highly durable, lightweight, and less expensive than glass.
However, the sign’s reflectiveness was affected as it was being raster engraved—an engraving process Steven’s used with the laser cutter previously.
Essentially, the raster engraving messed with the total internal refraction of the acrylic, making it much less reflective than it typically is.
Despite deflated feelings, not all projects are a loss in the face of a problem.
Knowing this, Steven set out to find a solution… And found it in a development of the design.
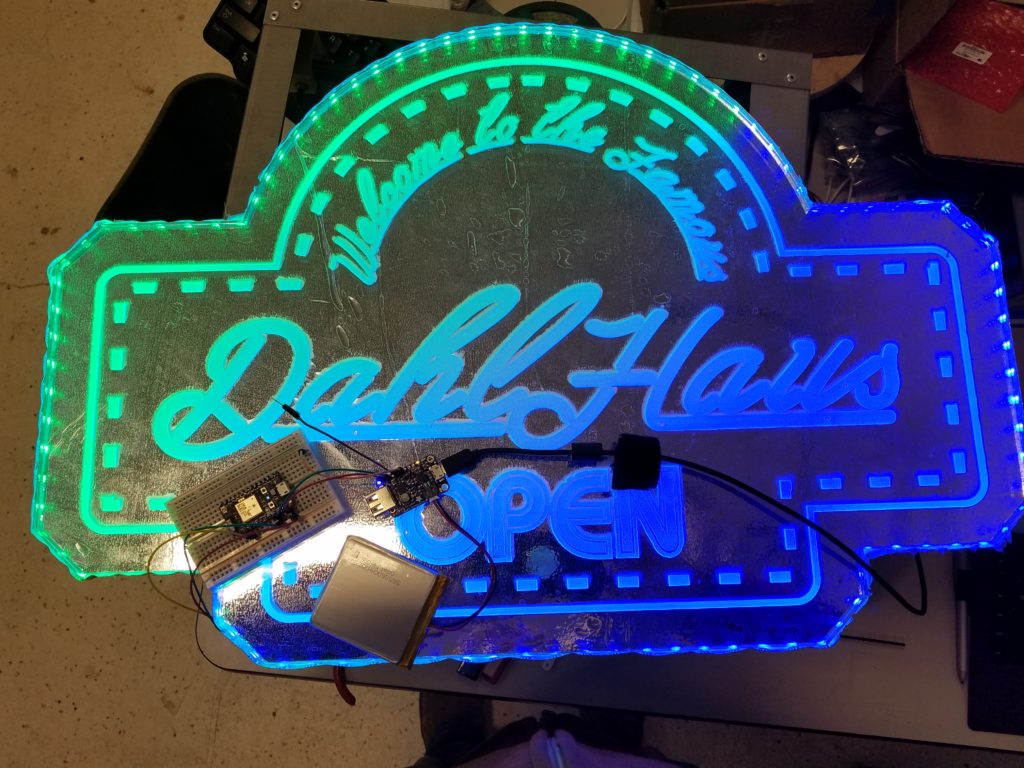
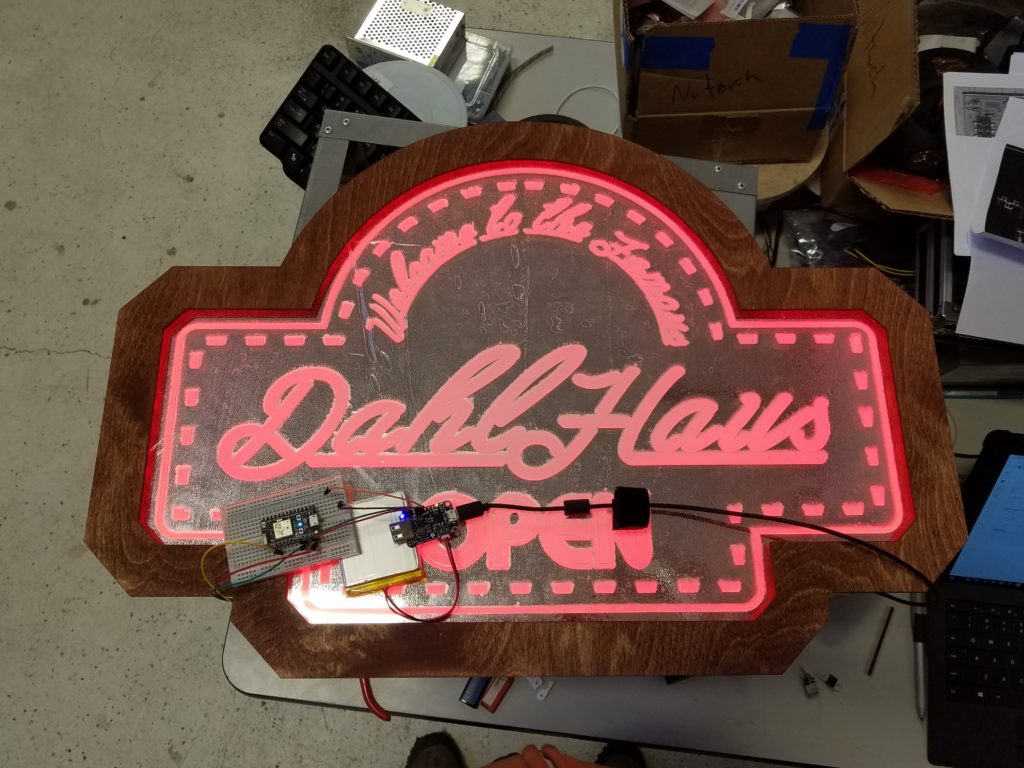
He decided to attach the LEDs to the outside of the acrylic and simply frame the entire sign with a wooden frame. Not only did this solve his rastering problem, but the sign also improved in it’s aesthetic properties from the initial design.
After vector cutting and staining the ⅛” birch frame, it was time to put all of the pieces together.
Both the LEDs and wooden frame were attached with strong silicone glue and left in a press overnight to ensure a strong bond. While those were sitting overnight, another Maker, Garrett, helped with creating a metal backing for the sign, which was also attached with silicone glue.
Last but not least, Steven had to test his newest project before handing it off.
Wielding a Spark Particle controller, he was able to control the lighting of the bar sign using WiFi and the app Particle, which allowed for the lights to change colors, patterns, and chase—much like bingo lights.
By the end of his project, Steven had a highly individualized piece of furniture for his friend’s house bar—just one piece to the mission of highly personalized home decor.
Today, the Dahl Haus’ Bar Sign still hangs proud in Brett’s home bar.
This is only part one of Anchorage MakerSpace’s MicroSeries. Keep an eye out for part two on our Facebook Page or feel free to visit us in person every Monday night.
Recent Comments